Welcome! This manual guides you through setup, operation, and maintenance of your Noma portable AC, ensuring optimal cooling and years of reliable performance.
What’s Included in the Box
Carefully unpack your Noma Portable Air Conditioner and verify that all components are present. You should find the main AC unit itself, a comprehensive instruction manual – this very document! – to guide you through operation and troubleshooting. Additionally, locate the window kit, designed for efficient exhaust venting, and the exhaust hose, crucial for expelling warm air outside.
A remote control is included for convenient operation from across the room. Check for the power cord, essential for powering the unit, and any included accessories like caster wheels (if not pre-installed) for easy mobility. Finally, ensure the presence of any foam inserts or packing materials used for protection during shipping; these are not part of the AC unit itself.
Safety Precautions
Prioritize safety during setup and operation! Always ensure the unit is properly grounded to prevent electrical shock. Never operate with a damaged cord or plug; replace immediately. Keep the AC unit away from flammable materials and water sources. Do not insert objects through the vents, as this could damage the internal components and create a hazard.
Unplug the unit before cleaning or performing maintenance. Avoid running the power cord under rugs or carpets. This AC is intended for indoor use only; outdoor operation voids the warranty and poses a safety risk. Supervise children and pets around the unit. If you notice unusual smells or noises, immediately disconnect power and consult a qualified technician.
Getting Started: Setup and Installation
Begin with careful preparation! This section details unpacking, location selection, window kit installation, and exhaust hose connection for optimal performance.
Unpacking and Inspection
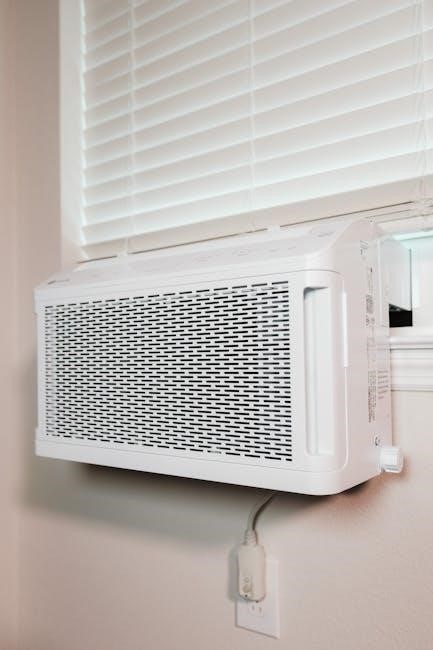
Carefully unpack your Noma portable air conditioner and verify all components are present. The box should contain the AC unit itself, a window kit (including panels and brackets), an exhaust hose, a remote control, and this instruction manual.
Inspect the unit for any visible damage incurred during shipping. Look for dents, scratches, or broken parts. If damage is found, do not attempt to operate the unit and immediately contact customer support.
Retain the original packaging for potential future transport or warranty claims. Ensure all protective materials are removed from the unit before installation. A complete inventory check against the parts list ensures a smooth setup process and avoids potential issues later.
Choosing the Right Location
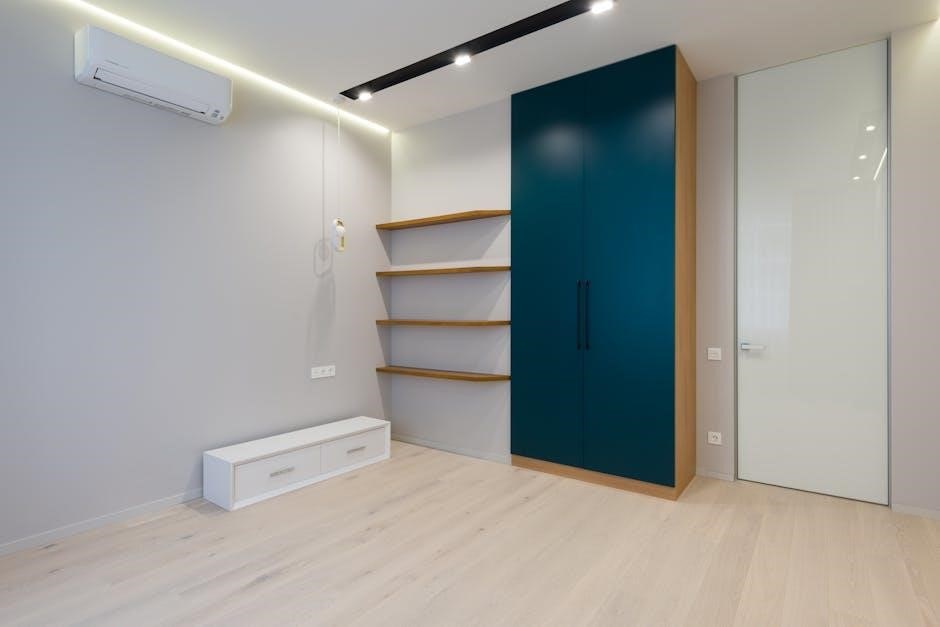
Select a location for your Noma portable AC that allows for adequate ventilation and efficient cooling. Position the unit on a level surface, ensuring at least 12 inches of clearance around all sides for optimal airflow.
Avoid placing the AC unit in direct sunlight, near heat sources, or in areas with high humidity. These conditions can reduce cooling efficiency and potentially damage the unit. Ensure the chosen location is close to a grounded electrical outlet.
Consider the exhaust hose routing before finalizing the location. The window kit must be installed in a suitable window to vent hot air outside. Avoid obstructions that may hinder airflow or restrict access for maintenance.
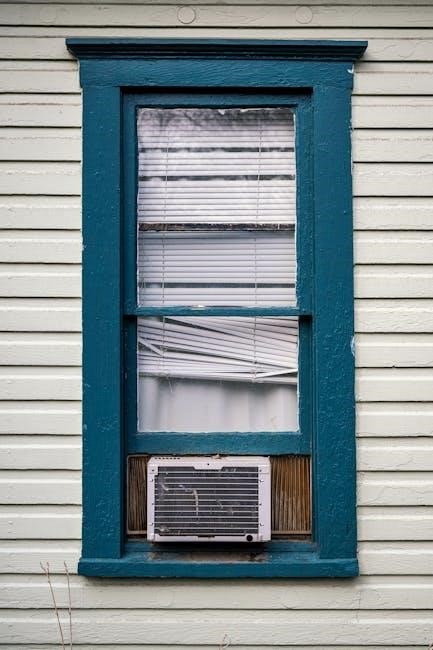
Window Kit Installation

Proper window kit installation is crucial for efficient operation of your Noma portable AC. Begin by selecting a suitable window that can be securely closed around the exhaust hose. Assemble the window kit components according to the included diagrams, adjusting the length of the panels to fit your window opening.
Securely attach the window kit to the window frame using the provided screws or brackets, ensuring a tight seal to prevent hot air from re-entering the room. Carefully insert the exhaust hose into the designated opening in the window kit, and firmly connect it to the AC unit.
Double-check for any gaps or leaks around the window kit and exhaust hose connection. Seal any openings with weather stripping or tape to maximize cooling performance.
Exhaust Hose Connection
Correct exhaust hose connection is vital for your Noma portable AC’s effectiveness. Begin by firmly attaching one end of the exhaust hose to the designated port on the rear of the air conditioner unit; ensure a secure, click-fit connection. Next, connect the other end of the hose to the installed window kit, again verifying a tight and stable fit.
Avoid bending or kinking the exhaust hose, as this restricts airflow and reduces cooling efficiency. The hose should maintain a relatively straight path to the outside. Regularly inspect the connections for looseness or damage, tightening as needed.
Proper sealing is key; any gaps will allow hot air to re-enter the room, negating the cooling effect.
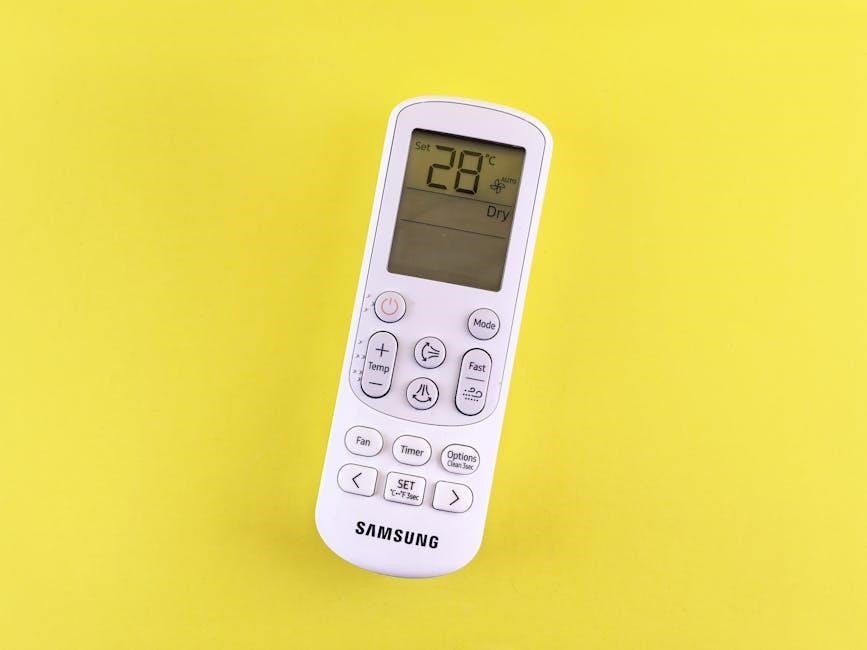
Understanding the Control Panel
The intuitive control panel allows easy adjustment of settings like power, cooling modes, temperature, fan speed, and timers for personalized comfort.
Power Button and Indicator Lights
The Power Button initiates the operation of your Noma portable air conditioner. A single press activates the unit, while another press turns it off. Observe the Indicator Lights for crucial status updates. A solid power light signifies the unit is on and functioning normally.
A flashing power light may indicate an error or that the unit is in standby mode. The cooling indicator light illuminates when the cooling function is active, and similarly, the fan or dry mode indicators will light up when those modes are selected. Pay attention to these lights; they provide quick visual cues regarding the AC’s operational state and potential issues, helping you maintain optimal performance and troubleshoot effectively.
Mode Selection (Cool, Fan, Dry)
Cool Mode lowers the room temperature, providing focused air conditioning. Fan Mode circulates air without cooling, ideal for ventilation. Dry Mode, or dehumidifying mode, reduces humidity levels, creating a more comfortable environment, especially in damp conditions.
To select a mode, use the designated buttons on the control panel or remote control. The currently selected mode will be indicated by an illuminated icon. Experiment with each mode to determine the best setting for your needs and preferences. Remember that Cool Mode requires the exhaust hose to be properly connected for effective operation, while Fan and Dry modes can function without it.
Temperature Adjustment
Adjusting the temperature is simple using the “+” and “-” buttons on the control panel or remote. The display shows the set temperature, which can be adjusted within a specified range, typically between 60°F and 85°F (16°C and 29°C).
Pressing the “+” button increases the set temperature, while pressing the “-” button decreases it. The unit will automatically adjust its cooling output to maintain the desired temperature. For optimal comfort and energy efficiency, start with a moderate temperature setting and adjust as needed. Allow sufficient time for the unit to reach the set temperature before making further adjustments.
Fan Speed Settings
Your Noma portable AC offers multiple fan speed settings to customize airflow and cooling intensity. Typically, there are three options: Low, Medium, and High. These settings are controlled via buttons on the control panel or the remote control, often indicated by icons representing fan blades.
Low speed provides a gentle breeze, ideal for quiet operation and minimal cooling. Medium speed offers a balance between airflow and noise. High speed delivers maximum cooling power, but may be louder. Experiment with different speeds to find the most comfortable setting for your needs and the room size.
Timer Function
The timer function on your Noma portable AC allows for convenient and energy-efficient operation. You can set the unit to automatically turn on or off after a specified period, ranging from 30 minutes up to 24 hours, depending on the model. This feature is perfect for pre-cooling a room before you arrive or automatically shutting off the unit while you sleep.
To set the timer, use the “Timer” button on the control panel or remote. Adjust the desired time using the “+” and “-” buttons. The display will show the remaining time until the unit shuts off or turns on. Remember to check your specific model’s instructions for detailed timer settings.
Operating Your Noma Portable AC
Enjoy cool comfort! This section details how to effectively use cooling, fan, and dehumidifying modes for optimal performance and personalized climate control.
Cooling Mode Operation
Achieving Optimal Cooling: To initiate cooling, ensure the unit is properly set up with the exhaust hose connected and vented outside. Press the “Mode” button on the control panel until the “Cool” icon illuminates. Utilize the “Temperature” buttons to select your desired room temperature; the unit will automatically adjust to maintain it.
Fan Speed & Comfort: Experiment with the “Fan Speed” settings – Low, Medium, and High – to find the balance between cooling power and noise level that suits your preference. For quicker cooling, select a higher fan speed. Remember to close windows and doors to maximize efficiency and prevent warm air from entering the room. Regularly check the water drainage indicator, as cooling generates condensation.
Fan Mode Operation
Utilizing Fan-Only Circulation: To operate in Fan Mode, press the “Mode” button on the control panel until the fan icon is displayed. In this mode, the unit circulates air without actively cooling it, providing a gentle breeze. This is ideal for days when you don’t require cooling but want air movement.
Adjusting Airflow: Select your preferred fan speed – Low, Medium, or High – using the corresponding buttons; Fan Mode is energy-efficient and can be used in conjunction with open windows to promote ventilation. Remember that Fan Mode does not remove humidity from the air, unlike Cooling or Dry Mode. Regularly inspect the fan blades for dust accumulation.
Dehumidifying (Dry) Mode Operation
Reducing Humidity Levels: Activate Dry Mode by pressing the “Mode” button until the dehumidifier icon illuminates. This mode extracts moisture from the air, creating a more comfortable environment, especially in damp conditions. The unit will operate at a lower fan speed to maximize water collection efficiency.
Water Collection & Drainage: Collected water accumulates in the internal tank. Regularly check the water level indicator and empty the tank when full to prevent overflow. Alternatively, connect a drainage hose for continuous operation; Dry Mode is beneficial for basements or humid climates, improving air quality and preventing mold growth. Ensure proper ventilation during operation.
Using the Remote Control
Convenient Control: Your Noma portable AC includes a remote control for effortless operation from across the room. Ensure the remote has fresh batteries for optimal performance. It mirrors all functions available on the unit’s control panel – power, mode selection (Cool, Fan, Dry), temperature adjustment, and fan speed control.
Timer & Settings: Utilize the remote’s timer function to schedule automatic operation, saving energy and ensuring comfort. Point the remote directly at the AC unit’s receiver for reliable communication. Keep the remote dry and avoid direct sunlight. Familiarize yourself with each button’s function for a seamless user experience.

Maintenance and Cleaning
Keep it Fresh! Regular cleaning of filters, the exterior, and proper water drainage are crucial for maintaining peak performance and extending the lifespan.
Filter Cleaning
Maintaining optimal airflow is essential for efficient cooling. Your Noma portable air conditioner features a washable filter that requires regular cleaning – typically every two weeks with consistent use, or more frequently in dusty environments. To access the filter, first ensure the unit is powered off and unplugged. Locate the filter access panel, usually on the rear of the unit. Gently remove the filter, and using a vacuum cleaner with a brush attachment, remove loose dust and debris.
For a more thorough cleaning, rinse the filter with lukewarm water, avoiding the use of detergents or harsh chemicals. Allow the filter to completely dry before reinstalling it into the unit. Never operate the air conditioner without the filter in place, as this can damage the unit and reduce its cooling performance. A clean filter ensures cleaner air and efficient operation.
Exterior Cleaning
Keeping the exterior of your Noma portable air conditioner clean enhances its appearance and helps maintain optimal performance. Before cleaning, always disconnect the unit from the power outlet. Use a soft, damp cloth to wipe down the exterior surfaces, removing dust, dirt, and fingerprints. Avoid using abrasive cleaners, solvents, or harsh chemicals, as these can damage the plastic casing.
For stubborn stains, a mild soap solution can be used, but ensure it is thoroughly rinsed off with a clean, damp cloth afterward. Never spray water directly onto the unit or submerge any part of it in water. Pay particular attention to the control panel and vents, ensuring they are free from dust and debris. Regular exterior cleaning contributes to the longevity and aesthetic appeal of your Noma AC.
Water Drainage
Your Noma portable air conditioner collects condensation during dehumidifying mode, and potentially during cooling in humid conditions. Regular water drainage prevents overflow and ensures efficient operation. Most models feature a drain plug at the rear or bottom of the unit. Carefully remove the plug and allow the water to drain completely into a suitable container.
Some units may have a continuous drain option via a hose connection – consult your specific model’s diagram. Always ensure the unit is switched off and unplugged before draining. After draining, securely replace the plug. Ignoring water drainage can lead to water leakage and potential damage to your unit or surroundings. Monitor water levels regularly, especially during prolonged use.
Winter Storage
Preparing your Noma portable AC for winter storage is crucial for longevity. Before storing, thoroughly clean the filter and exterior as detailed in the ‘Maintenance and Cleaning’ section. Drain all remaining water from the unit to prevent mold and mildew growth. Ensure the unit is completely dry before storage.
Store the AC in a cool, dry place, covered to protect it from dust and debris. Keep the power cord neatly coiled and secured. Avoid storing in extremely cold or humid environments. Periodically check the unit during storage to ensure no moisture buildup occurs. Proper winterization safeguards your investment for years of cooling comfort.
Troubleshooting Common Issues
Facing problems? This section offers solutions for typical issues like power failures, cooling problems, leaks, and unusual noises with your Noma AC.
Unit Not Powering On
Problem: Your Noma portable air conditioner isn’t responding when you press the power button. First, verify the power cord is securely plugged into both the unit and a functioning wall outlet. Test the outlet with another device to confirm it’s delivering power.
Check the circuit breaker or fuse box; a tripped breaker or blown fuse could be the culprit. Ensure the unit’s power switch, if present, is in the ‘on’ position. If using an extension cord, confirm it’s rated for the AC’s power requirements.
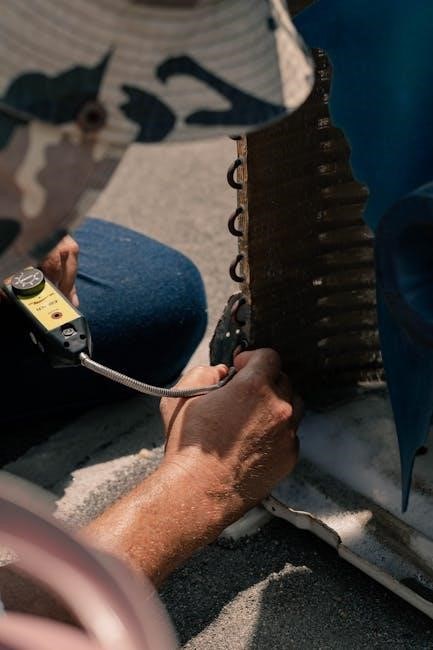
Inspect the power cord for any visible damage. If the issue persists, consult a qualified technician – do not attempt self-repair, as this could void your warranty and pose a safety risk.
Insufficient Cooling
Problem: Your Noma portable AC isn’t cooling the room effectively. Ensure the exhaust hose is correctly connected to the window kit and securely sealed – any leaks reduce efficiency. Check the air filter; a dirty filter restricts airflow, hindering cooling performance. Clean or replace the filter as needed.
Verify windows and doors are closed to prevent warm air from entering. Confirm the cooling mode is selected and the temperature is set significantly lower than the room temperature. Avoid placing the unit near heat sources or in direct sunlight.
Allow sufficient time for the unit to cool the room; initial cooling may take a while.
Water Leaking
Problem: Water is leaking from your Noma portable AC. Ensure the unit is level; an uneven surface can cause water to spill from the internal drain pan. Check the drain plug is securely tightened; if loose, water will leak. Regularly drain the water from the internal tank, especially during dehumidifying mode.
Inspect the exhaust hose connection for any condensation buildup, which could be dripping. Avoid running the unit in extremely humid conditions for extended periods without draining.
If leakage persists, contact customer support as it may indicate an internal issue requiring professional attention.
Strange Noises
Problem: Your Noma portable AC is making unusual sounds. A slight humming is normal during operation. Rattling noises could indicate loose screws or components; carefully inspect and tighten them. Clicking sounds might be the compressor starting or stopping – this is generally normal.
If you hear loud buzzing, grinding, or squealing, immediately power off the unit. This could signal a mechanical failure requiring professional repair. Ensure nothing is obstructing the fan blades, as this can cause disruptive noises.
Contact customer support if the noise persists or worsens, providing a detailed description.

Technical Specifications
Discover key details! This section outlines your Noma AC’s model/serial numbers, power needs, cooling capacity (BTU), and overall physical dimensions and weight.
Model Number and Serial Number Location
Identifying your unit is crucial for support and warranty claims. The model number and serial number are typically found on a sticker located on the rear panel of your Noma portable air conditioner. Carefully inspect the back of the unit, usually near the power cord connection or the exhaust hose outlet.
The sticker will clearly display “Model No.” followed by a series of alphanumeric characters, and “Serial No.” followed by a unique set of numbers. Please record both numbers in a safe place for future reference. Having this information readily available will streamline any service requests or warranty processes, ensuring a quicker and more efficient resolution to your needs. Retain your purchase receipt alongside these numbers.
Power Requirements
Ensure safe and efficient operation by verifying your electrical supply. Your Noma portable air conditioner is designed to operate on a standard 120V, 60Hz AC power supply. Before plugging in the unit, confirm that your outlet meets these specifications.
The power consumption, measured in watts, will be indicated on the unit’s rating label (along with the model and serial numbers). Avoid using extension cords whenever possible; if necessary, use a heavy-duty extension cord rated for at least the air conditioner’s wattage. Never operate the unit with a damaged power cord or plug. Improper voltage or inadequate wiring can damage the unit and pose a safety hazard.
Cooling Capacity (BTU)
Understanding BTU is crucial for selecting the right cooling power. Your Noma portable air conditioner’s cooling capacity is measured in British Thermal Units (BTU). This value indicates how much heat the unit can remove from a room per hour. A higher BTU rating generally means the unit can cool a larger space more effectively.
The specific BTU rating for your model will be clearly stated on the unit itself and in the product specifications. To determine if the BTU rating is suitable for your room, consider the room’s size, insulation, and sun exposure. Generally, 10 BTU per square foot is a good starting point for estimating cooling needs.
Dimensions and Weight
Knowing the physical specifications is important for placement and portability. The dimensions of your Noma portable air conditioner – height, width, and depth – are crucial for ensuring it fits comfortably in your desired location without obstructing doorways or airflow. These measurements are listed in the product specifications section of this manual.
The unit’s weight is also a key consideration, especially if you plan to move it between rooms frequently. While designed for portability, remember that a full water tank will add to the overall weight. Refer to the specifications for accurate weight details, aiding in safe and convenient relocation.
Warranty Information
Your Noma AC is protected! This section details the warranty coverage, duration, and procedures for submitting a claim should issues arise with your unit.
Warranty Coverage
Comprehensive Protection: Your Noma portable air conditioner is warranted against defects in materials and workmanship for a period of one (1) year from the date of original purchase. This warranty covers components that fail during normal residential use, such as the compressor, fan motor, and control panel.
What’s Included: We will, at our discretion, repair or replace the defective unit or component, free of charge. This includes parts and labor. However, the warranty does not cover damage resulting from misuse, abuse, improper installation, lack of maintenance, or acts of nature.
Limitations Apply: Damage caused by unauthorized repairs or modifications will void the warranty. Proof of purchase is required for all warranty claims. This warranty is non-transferable and applies only to the original purchaser.
How to Claim Warranty
Initiating a Claim: To initiate a warranty claim, please contact Noma Customer Support at 1-800-NOMA-CARE (1-800-666-2227) or visit our website at www.noma.com/support. Have your model number, serial number, and proof of purchase readily available. A detailed description of the issue will expedite the process.
Required Documentation: You will be required to submit a copy of your original purchase receipt or other proof of purchase. Photos or videos demonstrating the defect may also be requested to assist in the assessment.

Return Authorization: If a repair or replacement is authorized, we will issue a Return Merchandise Authorization (RMA) number and provide instructions for shipping the unit to our designated service center. Shipping costs are the responsibility of the customer, unless otherwise specified.